

How to Clean Up a Sewage Backup: Step-by-Step Safety Guide
A sewage backup is one of the most hazardous situations a homeowner can face. Raw sewage contains human waste, pathogens, bacteria, and viruses that pose serious health risks, and the longer contaminated water sits in your home, the worse the structural damage becomes.
This guide walks you through exactly what to do after a sewage backup, step by step, including when to attempt cleanup yourself and when to call a professional restoration company. RestorationMaster technicians have responded to thousands of sewage backup emergencies. The guidance below reflects the same protocols our IICRC-certified crews follow on every job.
Important: DIY sewage cleanup is only appropriate for minor, contained spills in a single room. Any backup that has spread across multiple rooms, been sitting for more than 24 hours, or originated from a septic tank or main sewer line requires professional remediation.
Key Takeaways: Sewage Cleanup
- Sewage backup is Category 3 water damage — remove all porous materials, do not clean them.
- Wear an N95 respirator, nitrile gloves, rubber boots, coveralls, and sealed goggles.
- Use a HEPA-filtered vacuum or submersible pump to remove standing water.
- Dry the area within 24 to 48 hours to prevent mold growth.
- DIY cleanup only applies to minor, contained, single-room spills.
- Never run HVAC or ceiling fans before the area is decontaminated.
- Sewage odor after 48 hours means hidden contamination remains.
What is Sewage?
Sewage is wastewater generated from toilets, sinks, showers, washing machines, and dishwashers in homes and businesses. While sewage is primarily water, it carries a mixture of human waste, urine, bacteria, viruses, parasites, chemicals, and soaps that make it a serious biohazard.
Under IICRC S500 standards, the water damage restoration industry classifies sewage backup as Category 3 water damage, the most contaminated and dangerous classification. This matters because it directly determines the cleanup protocol: all porous materials that come in contact with Category 3 water must be removed and discarded, not simply dried or cleaned.
Types of Sewage
- Blackwater: Wastewater from toilets. Contains human waste, urine, and the highest concentration of pathogens. Always classified as Category 3 water damage. Requires full protective gear and professional-grade disinfectants.
- Greywater: Wastewater from sinks, showers, and washing machines. Lower pathogen load than blackwater, but still contains contaminants, including soap, grease, and chemicals. Can degrade to Category 3 if left standing for more than 24 hours.
What Should I Do After Sewage Backup?
Before any cleanup begins, take the following precautions. Do not skip these steps, even if the spill appears minor.
- Evacuate children, elderly family members, and pets from the affected area immediately. Do not allow them back until the area is fully cleaned and cleared.
- Shut off electricity and gas to the affected area. Contact your utility company or turn off the breaker yourself, but only if the panel is located safely above the water line. Never step through standing water to reach an electrical panel.
- Turn off the water supply to prevent additional sewage from entering the space.
- Open windows to ventilate the affected area and reduce airborne contaminants.
- Close interior doors between the contaminated area and the rest of the home to limit the spread of sewage-contaminated air and debris.
- Do not attempt to unclog drains. The sewage water must be fully removed before addressing the underlying cause.
- Move dry, uncontaminated items out of the area if you can do so without entering the contaminated zone.
- Add small amounts of diluted chlorine bleach to standing water if you are unable to remove it immediately. This limits bacterial growth while you wait for extraction.
- Contact your homeowners’ insurance company. Document the damage thoroughly with photos and video before cleanup begins. You will need this for your insurance claim.
How to Clean Up a Sewage Backup: Step-by-Step
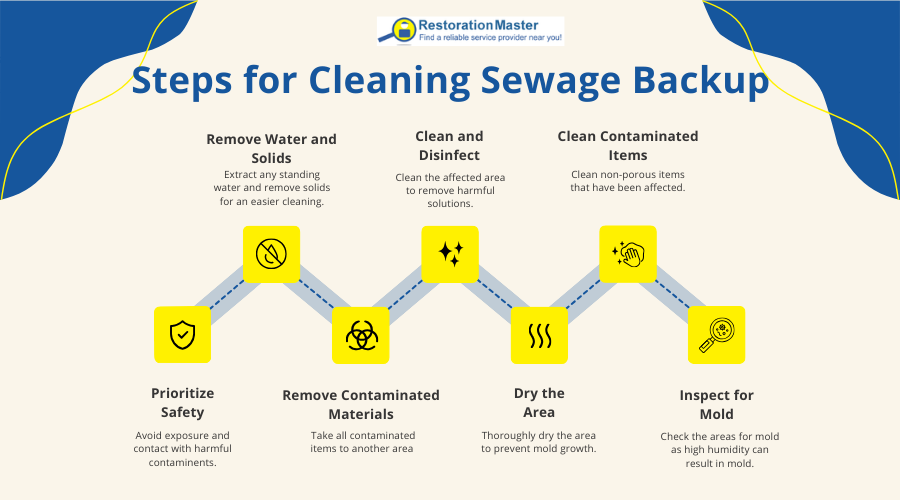
These steps apply to minor, contained sewage spills only. If the backup has spread beyond a single room, originated from a main sewer line or septic system, or has been sitting for more than 24 hours, stop here and call a professional restoration company.
Step 1: Put On the Right Protective Equipment
This is not optional. Sewage contains pathogens that cause serious illness, including E. coli, hepatitis A, Salmonella, and leptospirosis. Before entering the affected area, you need:
- N95 or P100 respirator (not a standard dust mask, which does not filter biological particles)
- Nitrile or rubber gloves rated for chemical and biological hazards
- Rubber boots or waterproof shoe covers
- Waterproof coveralls or clothes you are prepared to discard after cleanup
- Safety goggles that seal against your face (standard glasses do not protect against splash exposure)
Do not allow any skin to come into direct contact with sewage water or contaminated surfaces.
Step 2: Remove Standing Water and Solid Waste
Remove sewage water as quickly as possible. For small volumes, use a wet-dry vacuum equipped with a HEPA filter (standard shop vac filters are not adequate for sewage). For larger volumes, use a submersible pump or call a professional for water extraction.
Carefully collect solid waste using disposable tools and place it directly into heavy-duty plastic bags. Double-bag the waste, seal it tightly, and dispose of it immediately. Do not leave bagged sewage waste sitting in the affected area.
Step 3: Remove and Discard Contaminated Porous Materials
Under IICRC Category 3 protocol, any porous material that has been in contact with sewage must be removed and discarded. This includes:
- Carpet, carpet padding, and area rugs
- Drywall and wall paneling (up to at least 12 inches above the water line)
- Flooring underlayment and insulation
- Upholstered furniture and mattresses
- Books, paper products, and cardboard
- Food and consumable goods of any kind
These materials cannot be reliably cleaned and disinfected. Attempting to salvage them creates ongoing mold and pathogen risk.
Step 4: Clean and Disinfect All Surfaces
Wash all hard surfaces (walls, floors, baseboards, concrete) with hot water and a bactericidal disinfectant. Follow this sequence:
- First pass: scrub with hot water and a quality household detergent to remove physical contamination
- Second pass: disinfect with a solution of 1 part chlorine bleach to 4 parts water, applied with a stiff brush
- Rinse thoroughly with clean water
- Apply an EPA-registered disinfectant rated for sewage or Category 3 water damage for a final pass
Pay extra attention to floor grout, wall corners, and any surfaces that have had prolonged contact with standing water. These areas harbor bacteria even after visible contamination is removed.
Step 5: Dry the Area Completely
After disinfecting, the affected area must be dried completely within 24 to 48 hours to prevent mold growth. Mold can begin colonizing damp materials in as little as 24 hours following a water intrusion event.
Use a combination of:
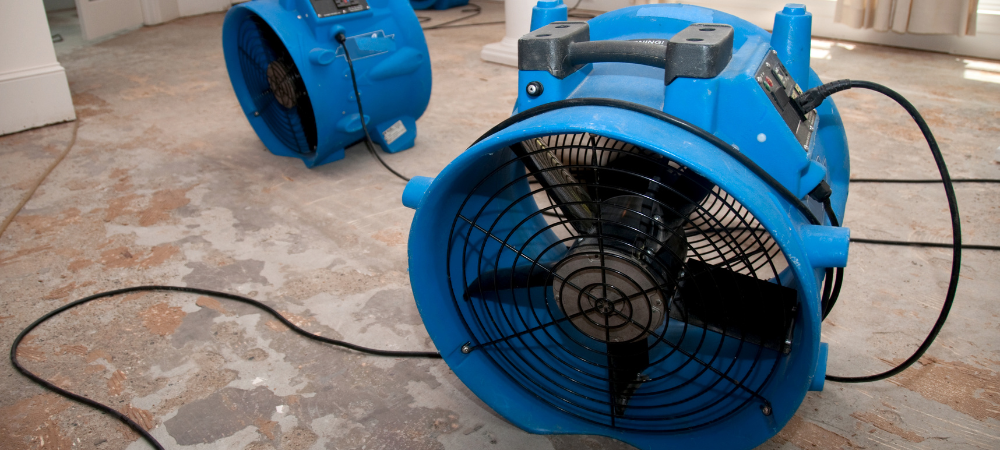
- High-volume fans or air movers directed at wet surfaces
- Commercial-grade dehumidifiers (residential units are often insufficient for this level of saturation)
- Open windows if the outdoor humidity is lower than the indoor humidity
Monitor moisture levels with a moisture meter. Do not close up walls or replace flooring until readings return to normal baseline levels.
Step 6: Clean or Discard Contaminated Items
Non-porous items (hard furniture, appliances, tile surfaces) can be cleaned with an antibacterial disinfectant, rinsed thoroughly, and allowed to dry completely before reuse.
- For clothing and linens with minor sewage contact: Machine wash on the hottest setting appropriate for the fabric, with one cup of chlorine bleach added if the fabric can tolerate it.
- For items with high sentimental or monetary value: Contact a professional contents restoration company before discarding. Specialized cleaning techniques can sometimes salvage items that appear unsalvageable.
Step 7: Inspect for Mold
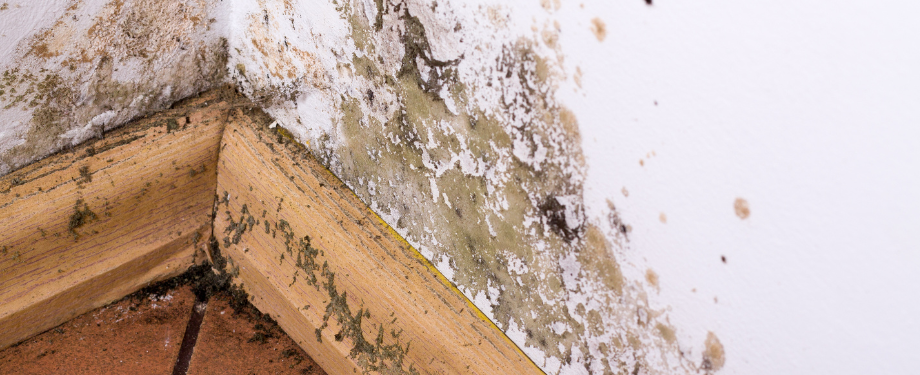
Sewage backups create ideal conditions for mold growth throughout the affected area, including on surfaces that had no direct contact with wastewater. Elevated indoor humidity affects areas well beyond the visible spill zone. After cleanup and drying, inspect all surfaces for visible mold growth. Pay close attention to wall cavities, behind baseboards, under flooring, and in ceiling spaces above the affected area if water wicked upward.
Use an EPA-approved mold cleaner to address any visible mold growth. If the affected area is larger than 10 square feet, or if mold is present inside walls or ductwork, contact a mold remediation specialist. Disturbing large mold colonies without proper containment spreads spores throughout your home.
What NOT to Do After a Sewage Backup
These common mistakes can make a sewage backup significantly worse, create health hazards, or damage your insurance claim.
- Do not run your HVAC system or ceiling fans before the area is decontaminated. Running forced air before cleanup is complete aerosolizes sewage-contaminated particles and spreads them throughout your entire home through the duct system.
- Do not use a standard shop vacuum on sewage water. A regular wet-dry vacuum without HEPA filtration will blow contaminated particles into the air. If you do not have a HEPA-filtered unit, use a pump or call a professional for extraction.
- Do not pour undiluted bleach directly onto sewage. Undiluted bleach can react with organic waste and produce toxic chlorine gas. Always dilute bleach before use (1 part bleach to 4 parts water).
- Do not delay cleanup. After 24 hours, the bacterial load in sewage water increases exponentially. Category 3 water that was manageable at the 2-hour mark becomes significantly more hazardous by the 24-hour mark.
- Do not attempt to clean and keep porous materials. Carpet, drywall, and insulation that have absorbed sewage cannot be reliably disinfected. Keeping them creates ongoing mold and pathogen risk.
- Do not ignore odor after cleanup. Persistent sewage odor after cleanup indicates residual contamination, often in hidden areas like subfloor cavities, wall voids, or drain traps. Do not assume the odor will dissipate on its own.
How to Get Rid of Sewage Smell After a Backup
Sewage odor after cleanup is caused by two things: residual hydrogen sulfide gas (the primary source of the “rotten egg” smell) and ongoing bacterial activity in contaminated materials that were not fully removed or disinfected.
Surface cleaning alone will not eliminate sewage odor. To address it properly:
- After disinfecting, apply an EPA-registered odor neutralizer (not a masking agent or air freshener, which only cover the smell temporarily)
- Run air scrubbers with HEPA and activated carbon filters, which remove both particulates and odor-causing gases
- Check subfloor cavities and wall voids, where contaminated water may have wicked upward into areas that were not cleaned
- Flush all drains in the affected area with a diluted bleach solution to eliminate odor-causing bacterial buildup in the drain traps
- Replace any drain trap water seals that may have dried out, as empty P-traps allow sewer gas to enter the home directly
If sewage odor persists more than 48 hours after cleanup, contamination likely remains in a concealed location. This is a strong indicator that professional remediation is needed.
Health Risks of Sewage Exposure
Sewage is classified as a biohazard because it contains active pathogens capable of causing serious disease. Exposure during a sewage backup can occur through direct skin contact, ingestion of contaminated water or food, or inhalation of aerosolized particles.
Diseases associated with sewage exposure include:
- Hepatitis A (viral liver infection transmitted via the fecal-oral route)
- E. coli infection (can cause severe gastrointestinal illness and kidney failure)
- Salmonella (causes severe diarrhea, fever, and abdominal cramps)
- Leptospirosis (bacterial infection that can lead to kidney damage, meningitis, and liver failure)
- Cryptosporidiosis (parasitic infection causing severe diarrhea, particularly dangerous for immunocompromised individuals)
- Giardia (parasitic infection causing gastrointestinal illness)
Children, elderly individuals, pregnant women, and anyone who is immunocompromised face a significantly higher risk from sewage exposure. If any of these individuals were in the affected area, consult a healthcare provider even if no immediate symptoms are present.
When to Call a Professional Sewage Cleanup Company
Professional sewage cleanup is always the safer option. It is required in the following situations:
- The spill has spread beyond a single room. Multi-room contamination requires industrial extraction equipment and full decontamination protocols that are not practical for DIY.
- The backup has been sitting for more than 24 hours. After 24 hours, bacterial and viral load increase significantly, making DIY cleanup substantially more hazardous.
- The backup originated from a main sewer line or septic system. These sources produce the highest contamination levels and the largest volume of sewage.
- If there is any chance that sewage water contacted your HVAC system. Contaminated ductwork requires professional duct cleaning to restore safe indoor air quality.
- Structural materials (drywall, subfloor, framing) are affected. Removing and replacing structural materials requires moisture mapping, controlled demolition, and clearance testing.
- Any household member has a compromised immune system, is elderly, or is pregnant. Elevated health risk justifies professional handling regardless of spill size.
- Visible mold is present. Mold that appears within 24 to 48 hours of a sewage backup indicates rapid colonization. Professional remediation is needed to contain it safely.
How Much Does Sewage Backup Cleanup Cost?
Sewage backup cleanup costs vary based on the size of the affected area, the materials impacted, and whether structural restoration is needed. Use the table below as a general reference.
| Scenario | Estimated Cost | Notes |
|---|---|---|
| Minor bathroom/utility area backup | $2,000 – $3,500 | Contained spill, single room, no structural damage |
| Kitchen or laundry room backup | $2,500 – $4,500 | May involve appliances and cabinetry |
| Basement sewage backup | $3,000 – $7,000 | Larger area, potential flooring/drywall removal |
| Full home sewage backup | $7,000 – $10,000+ | Structural materials affected, mold risk |
| Septic tank pumping | $250 – $500 | Add-on if a septic system is involved |
| Sewer line clearing (plumber) | $150 – $300 | For a clogged municipal line |
These figures reflect cleanup and water damage mitigation only. Structural repairs, flooring replacement, and contents restoration are billed separately. Most homeowners’ insurance policies cover sudden and accidental sewage backups, though coverage for gradual issues or sewer line damage varies by policy. Review your policy and contact your insurer as early as possible.
Contact RestorationMaster for Emergency Sewage Cleanup
RestorationMaster has responded to sewage backup emergencies throughout the United States. Our IICRC-certified technicians are available 24 hours a day, 7 days a week, and can be on-site within hours of your call.
We handle the complete cleanup and restoration process from start to finish: water extraction, disinfection, structural drying, demolition of unsalvageable materials, mold prevention, odor removal, and full property restoration. We also work directly with homeowners’ insurance companies and can document your claim from the initial assessment.
Frequently Asked Questions
What is Category 3 water damage?
Category 3 is the IICRC S500 classification for grossly contaminated water that contains pathogenic agents and poses a significant health threat. Sewage backup is always classified as Category 3. This classification requires full removal of all affected porous materials and EPA-registered disinfection of all surfaces. It is the most serious water damage classification and cannot be treated the same way as a clean water leak.
How do you get rid of sewage smell after cleanup?
Persistent sewage odor after cleanup means residual contamination remains somewhere in the affected space, often in subfloor cavities, wall voids, or drain traps. To eliminate it: use an EPA-registered odor neutralizer (not an air freshener), run activated carbon air scrubbers, flush and treat all drains in the affected area, and inspect concealed spaces for hidden contamination. If odor persists after 48 hours, call a professional.
How do you prevent sewage backups?
The most effective prevention steps are: have your sewer line inspected and cleaned every 1 to 2 years if you live in an older home or have trees near the sewer line, install a backwater valve on your main drain line, avoid flushing anything other than toilet paper, and have your septic tank pumped every 3 to 5 years if you are on a private system. If your neighborhood has experienced sewer backups during heavy rain, talk to your municipality about a backwater valve subsidy program.
Does sewage backup cause mold?
Yes. Sewage backups create the two conditions mold requires: organic material and moisture. Mold can begin growing within 24 to 48 hours of a water intrusion event, and sewage-saturated materials like drywall, insulation, and wood framing are highly susceptible. Thorough drying within the first 24 to 48 hours is the most important factor in preventing mold growth after a sewage backup.

About Vince Sandri
Vince Sandri is a disaster restoration content specialist with more than 12 years of experience researching, writing, and educating property owners about water damage, fire and smoke damage, mold remediation, storm damage, and other disaster recovery topics. Since 2014, he has served as the lead contributor to RestorationMaster.us, where he has developed hundreds of in-depth service pages, educational guides, and industry-focused articles for restoration professionals across the United States.
Through extensive research and ongoing collaboration with restoration contractors, Vince has built a strong foundation in the science, processes, and best practices behind property damage mitigation and recovery. His work aligns with industry standards like the IICRC and EPA guidelines, and helps homeowners, business owners, and property managers understand how disasters impact structures, what immediate steps to take, how professional restoration works, and how to prevent long-term structural and health risks.
Vince specializes in translating complex restoration procedures — including water extraction, structural drying, smoke odor removal, mold containment, and storm damage repair — into clear, actionable information that empowers readers to make informed decisions during high-stress situations. His content aligns with industry standards and focuses on safety, accuracy, and practical response strategies.
He earned his Bachelor of Arts degree from Aurora University and his master’s degree from DePaul University. Since 2012, Vince has focused on SEO-driven website content, technical service pages, and educational resources within the disaster restoration industry.
Outside of his professional work, Vince is also a musician and performs in the Chicago, IL area.