






Tips to Prevent and Remove Mold from Grout Lines (Complete Guide)
Mold in grout lines is a common issue in bathrooms, kitchens, and other humid areas. Thanks to grout’s porous nature and constant exposure to moisture, it becomes a magnet for mold and mildew. In this guide, you’ll learn the most effective ways to prevent mold growth in grout lines and how to remove mold from grout using both natural and chemical cleaning methods like bleach, vinegar, baking soda, hydrogen peroxide, and salt.
Why are Grout Lines Vulnerable to Mold Growth?
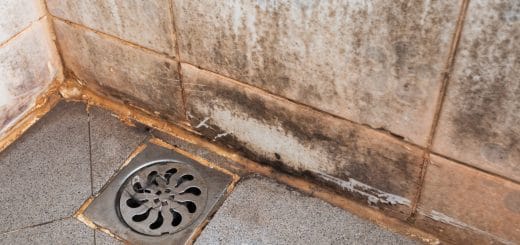
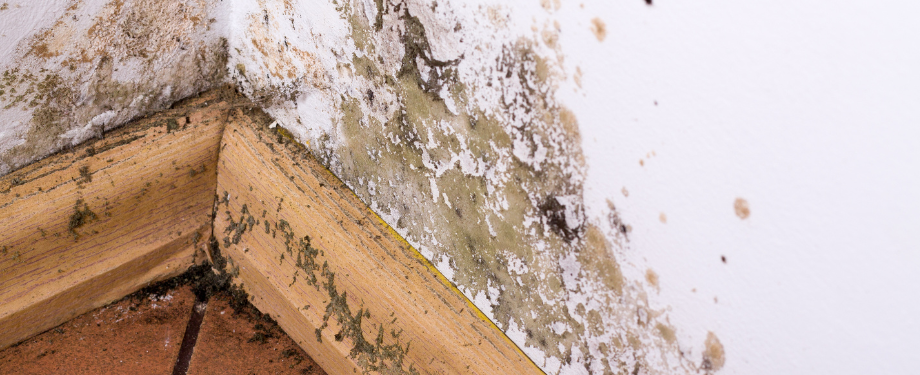
Mold thrives in warm, damp spaces with poor air circulation, making bathrooms, kitchens, laundry rooms, and basements prime spots for mold growth. It’s common to see mold on walls, ceilings, caulking, and on the grout lines between tiles in these rooms.
Tile grout is particularly vulnerable to mold because tile surfaces are typically used in moisture-rich areas for kitchen backsplashes, shower enclosures, and bathroom floors, and grout’s porous nature makes it a magnet for mold growth. When mold accumulates on grout, it doesn’t just make your kitchen or bathroom look dirty and outdated, it can also pose serious health risks to your family and compromise the structural integrity of your home.
The following are the main reasons why grout lines are often affected by mold:
- Porous Material: Grout is made from a mixture of cement, sand, and water, which makes it highly porous. This means it absorbs moisture easily, creating an ideal environment for mold to thrive.
- Constant Moisture Exposure: Grout is commonly used in areas with high humidity and frequent water use, such as bathrooms, kitchens, and laundry rooms. These moist conditions encourage mold spores to settle and grow.
- Poor Ventilation: In many bathrooms and enclosed spaces, lack of proper ventilation allows humidity to linger, which accelerates mold growth in damp grout lines.
- Soap Scum and Organic Debris: Grout often collects soap scum, skin cells, and other organic matter which are common food sources for mold and mildew.
- Difficulty Cleaning: The narrow and uneven nature of grout lines makes them harder to clean thoroughly, allowing mold to take hold in crevices and grow undisturbed.
10 Ways to Prevent Mold Growth in Grout Lines
As the saying goes, prevention is the best cure. Instead of spending time scrubbing mold from grout lines, why not stop it from forming in the first place? The secret to preventing mold is simple: eliminate moisture, its main ingredient. By keeping your tiles dry, you can save yourself the hassle of dealing with mold altogether.
But how do you control moisture in spaces like bathrooms, which are designed to get wet? While you can’t completely eliminate water in these areas, you can minimize dampness as there’s a big difference between surfaces that dry quickly and those that stay constantly wet.
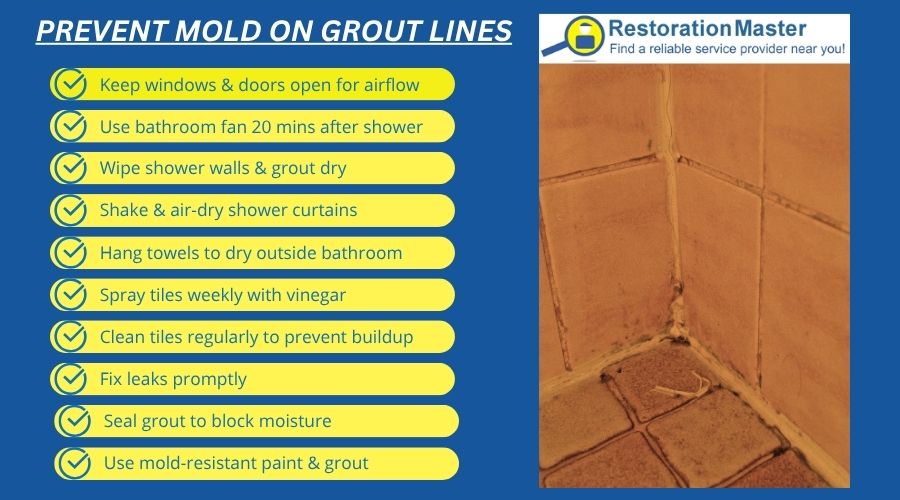
To help you manage humidity and prevent mold on grout lines in your bathroom, kitchen, and other spaces, here are a few simple yet effective steps you can follow:
- Try to keep doors and windows open as much as you can to let fresh air flow through your home. After you shower, leave the bathroom window open for at least 15 minutes so the extra moisture can escape instead of sticking to the walls and tiles. When you’re not using the shower, keep the door open to help it dry out faster. While cooking, open kitchen windows to let steam clear out. And don’t forget to regularly air out spaces like the laundry room, basement, and attic to keep humidity levels down.
- Use the bathroom exhaust fan for about 20 minutes after showering to effectively remove moisture from the air.
- Wipe down shower walls and floors after bathing using a squeegee, hand towel, or washcloth. Pay special attention to grout lines and corners where mold tends to appear first.
- Choose easy-to-clean shower curtains and liners and maintain them regularly. Shake off excess water after showering and leave the curtain partially open to dry faster without hindering air circulation.
- Hang bath towels to dry after use instead of leaving them wet in the bathroom, as this contributes to humidity.
- Spray bathroom tiles and caulking with a mold-preventing solution once a week. Use a natural anti-mold spray by mixing equal parts white vinegar and water or add 10 drops of tea tree oil to a spray bottle filled with water.
- Keep tiles clean with regular scrubbing. Soap scum can build up over time, creating a porous layer that promotes mold growth. Cleaning frequently reduces this risk.
- Fix leaky faucets and showerheads to eliminate the extra moisture they add to your bathroom and kitchen.
- Seal grout lines with a silicone-based grout sealant to reduce moisture absorption and promote faster drying. Many sealants also include antimicrobial properties to protect against mold and other microbes.
- Use mold-resistant paint and grout with anti-fungal additives when repainting your bathroom or kitchen or installing new tiles.
By following these steps, you can significantly reduce the likelihood of mold growth and keep your bathroom and kitchen in excellent condition. However, if mold does develop in the grout lines, remove it promptly to prevent it from spreading.
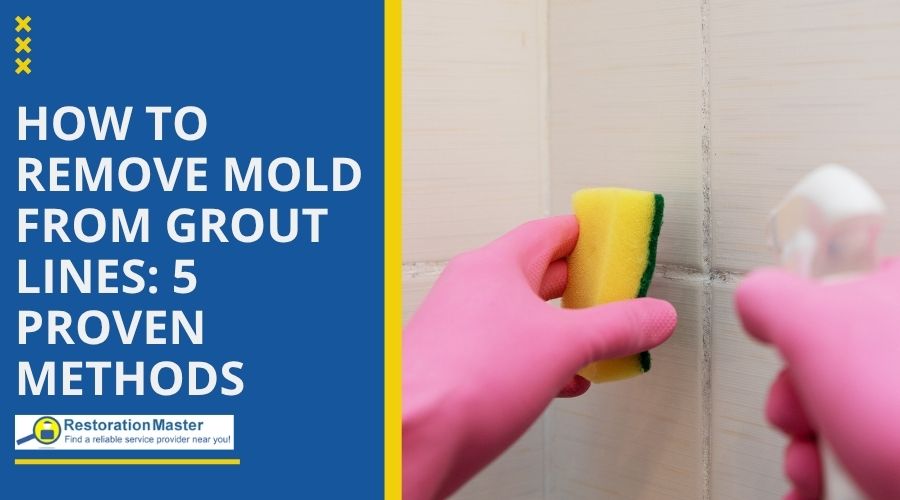
How to Remove Mold from Grout Lines: 5 Proven DIY Methods
Removing mold from grout lines takes patience and a bit of effort. It’s essential to clean the visible patches of mold as well as disinfect the area thoroughly to ensure all mold spores are eliminated, restoring a safe and hygienic environment in your bathroom or kitchen.
Are you wondering how to remove mold from shower grout, kitchen backsplash tiles, or bathroom grout lines? There are several effective methods you can use to remove mold from grout lines and prevent it from coming back. The following are the best methods:
Removing Mold from Grout with Bleach
Bleach is a powerful and effective mold-killer, especially for non-porous surfaces like tile and sealed grout. If you’re dealing with visible mold on grout lines, here’s a step-by-step guide to safely and effectively remove it using bleach:
- Ventilate the Area
Open windows or turn on exhaust fans to ensure proper airflow. Bleach fumes can be strong and irritating. - Prepare the Bleach Solution
Mix 1 part bleach with 3 parts water in a spray bottle. (For tough mold, a 1:1 ratio can be used, but start with a diluted solution if possible.) - Apply the Solution
Spray the bleach mixture directly onto the moldy grout lines. Be generous but avoid soaking surrounding materials. - Let It Sit
Allow the bleach to sit on the grout for 10–15 minutes. This gives it time to kill mold spores and loosen staining. - Scrub the Grout
Using a stiff-bristled brush or an old toothbrush, scrub the grout lines thoroughly. Focus on the moldy areas, using circular motions. - Rinse the Area
Wipe down the area with a clean, damp cloth to remove any remaining bleach and mold residue. You can also rinse with warm water if possible. - Dry Thoroughly
Use a clean towel or fan to dry the area completely. Moisture left behind can invite mold back.
Important Tips:
- Never mix bleach with ammonia or vinegar as this can create toxic fumes.
- Test a small hidden area first to make sure the bleach doesn’t discolor your grout.
- If mold returns frequently, consider sealing your grout after cleaning.
How to Remove Mold from Grout with Baking Soda
Baking soda is a gentle, natural, and effective way to remove mold from grout without the harsh fumes of chemical cleaners. It not only helps lift mold and stains but also deodorizes and mildly disinfects. Here’s how to use it:
- Make a Baking Soda Paste
In a small bowl, mix baking soda with just enough water to form a thick paste, about 3 parts baking soda to 1 part water. - Apply the Paste
Spread the paste directly onto the moldy grout lines using your fingers or a brush. Make sure to coat all affected areas. - Let It Sit
Allow the paste to sit on the grout for 10–15 minutes. This gives the baking soda time to break down mold and grime. - Scrub the Grout
Use a stiff brush or an old toothbrush to scrub the grout lines. Focus on moldy spots, scrubbing in small circles to lift mold from the pores of the grout. - Optional: Spray with Vinegar
For extra cleaning power, lightly spray white vinegar over the baking soda paste before or during scrubbing. It will fizz, which helps loosen grime and mold even further. - Rinse Clean
Wipe the area with a damp cloth or sponge to remove the paste and any loosened mold. Rinse well with warm water if needed. - Dry the Area
Use a towel to dry the grout lines completely. Mold thrives in damp environments, so drying is crucial.
Extra Tips:
- This method is safe for most tile surfaces and won’t discolor the grout.
- Repeat weekly or as needed to maintain clean grout lines.
- Seal your grout after deep cleaning to prevent mold from returning.
- You can use borax with the same method as its alkaline qualities make it very effective for cleaning, disinfecting, and deodorizing grout affected by mold.
How to Remove Mold from Grout with Salt
Salt is a natural mold inhibitor with antimicrobial properties, making it a surprisingly effective and eco-friendly option for removing mold from grout. When applied correctly, salt can dehydrate and kill mold spores while gently scrubbing away stains. Here’s how to use salt to clean moldy grout lines:
- Dampen the Grout
Lightly spray or wipe the moldy grout with water to make it slightly damp. This helps the salt stick to the surface and start working. - Apply Salt
Sprinkle a generous amount of salt directly onto the damp grout lines. Use your fingers or a dry brush to press it into the grout, ensuring good contact. - Scrub the Area
Using a stiff brush or an old toothbrush, scrub the salt into the grout lines. The abrasive texture of salt helps dislodge mold and stains while killing mold cells. - Let the Salt Sit
After scrubbing, let the salt sit on the grout for at least 12 hours or overnight. Salt works by drawing moisture out of the mold, which helps kill it at the root. - Rinse and Wipe
The next day, rinse the area with warm water and wipe it clean with a cloth or sponge to remove all salt residue. - Dry Completely
Use a towel or fan to ensure the area is thoroughly dry to prevent new mold from forming.
Pro Tips:
- Use coarse salt for more scrubbing power if your grout can handle it.
- For extra mold-fighting strength, mix salt with lemon juice or white vinegar to make a paste before applying.
- Always test a small area first to ensure your tile and grout respond well to this method.
How to Remove Mold from Grout with Vinegar
White vinegar is a natural, non-toxic solution that’s highly effective at killing mold and mildew. Its mild acidity helps break down mold while also disinfecting surfaces, making it a great choice for cleaning moldy grout without harsh chemicals. Here’s how to use vinegar to get rid of mold in grout lines:
- Pour Vinegar into a Spray Bottle
Use full-strength white vinegar, no need to dilute. Pour it into a spray bottle for easy application. - Spray the Affected Grout
Spray the vinegar generously onto the moldy grout lines. Make sure the area is saturated. - Let It Sit
Allow the vinegar to sit on the grout for at least 1 hour. This gives it time to kill mold spores and break down buildup. - Scrub the Grout
After soaking, scrub the grout with a stiff-bristled brush or toothbrush to remove loosened mold and stains. - Optional: Add Baking Soda for Stubborn Mold
For deeper cleaning, sprinkle baking soda on the grout before scrubbing, or make a paste by mixing baking soda with a little water. When combined with vinegar, it creates a fizzing action that helps lift grime and mold from the grout. - Rinse the Area
Wipe or rinse the area with warm water to remove residue. - Dry Thoroughly
Use a clean towel to dry the grout completely. Mold thrives in damp conditions, so drying is essential.
Extra Tips:
- Vinegar may not work well on natural stone surfaces (like marble or travertine), as the acidity can cause damage. Use an alternative method in these cases.
- Repeat weekly or as needed to keep mold from coming back.
- For long-term protection, consider sealing your grout after it’s clean and dry.
How to Remove Mold from Grout with Hydrogen Peroxide
Hydrogen peroxide is a powerful mold remover and disinfectant that penetrates porous surfaces like grout to kill mold at the root. It’s also a safer alternative to bleach as it is non-toxic, odorless, and effective against bacteria, fungi, and mildew. If you’re dealing with stubborn grout mold, hydrogen peroxide is a smart, budget-friendly solution.
- Apply Hydrogen Peroxide
Pour 3% hydrogen peroxide into a spray bottle or apply directly to moldy grout with a dropper. Saturate the affected area thoroughly. - Let It Sit
Allow it to sit for 10–15 minutes. The bubbling action helps lift mold, dirt, and stains while breaking down the mold’s structure. - Scrub the Grout
Use a stiff brush or old toothbrush to scrub the grout. Focus on areas with visible mold or discoloration. - Optional: Make a Peroxide-Baking Soda Paste
For extra scrubbing power, mix hydrogen peroxide and baking soda to form a thick paste. Apply it to the grout, let it sit for 10–15 minutes, then scrub and rinse. - Rinse and Wipe Clean
Use a damp cloth or sponge to wipe away residue. Rinse with water to remove any remaining peroxide or mold debris. - Dry the Area
Mold thrives in moisture, so make sure the area is completely dry using a towel or fan.
Extra Tips:
- Use in a well-ventilated space and avoid contact with eyes or clothing.
- Hydrogen peroxide is generally safe for most tile and grout but can cause discoloration on colored grout, so test it in a small, hidden area first.
- Reapply weekly in humid environments to prevent mold regrowth.
Choosing the Right Cleaner: Bleach vs. Vinegar vs. Baking Soda vs. Hydrogen Peroxide
| Cleaner | Mold-Killing Strength | Safe for Grout? | Fumes / Odor | Natural / Non-Toxic | Best Used For | Notes |
|---|---|---|---|---|---|---|
| Bleach | Very High | Sealed grout only | Strong, harsh | ❌ No | Deep mold in sealed grout or tile surfaces | Kills mold on the surface but doesn’t penetrate porous materials. |
| White Vinegar | Moderate to High | Yes (safe for regular use) | Strong but natural | ✅ Yes | Light to moderate mold; regular maintenance | Helps prevent mold from returning with regular use. |
| Baking Soda | Low to Moderate | Yes | No odor | ✅ Yes | Gentle scrubbing; deodorizing; combined with vinegar | Mild abrasive; often used with vinegar for a fizzing clean. |
| Hydrogen Peroxide | High | Yes | Mild, chemical-like | ✅ Yes | Mold in porous or stained grout; disinfection | Penetrates better than bleach; also acts as a whitener and sanitizer. |
Professional Mold Removal
Mold in grout lines might start as a small nuisance, but if ignored, it can quickly lead to larger issues. With the right preventive steps and effective cleaning methods, like using bleach, baking soda, vinegar, salt, or hydrogen peroxide, you can keep mold from taking hold or remove it before it spreads. Regular ventilation, moisture control, and routine tile cleaning go a long way in protecting your home’s surfaces. Whether you’re dealing with a small patch of mildew or a more stubborn buildup, tackling mold early and consistently will help keep your tiled spaces clean, fresh, and safe for everyone in your household.
If you’ve tried all the DIY methods and mold keeps coming back, or if you’re facing a severe or widespread infestation, it’s time to call in the experts. At RestorationMaster, we can help you find a professional mold remediation contractor that offers comprehensive mold removal, including deep grout cleaning and long-term prevention solutions. These certified technicians use advanced tools and eco-friendly treatments to eliminate mold at its source and protect your home from future outbreaks. Don’t let mold compromise your family’s health or your property’s value. Contact us today to find a mold remediation specialist near you.
Frequently Asked Questions
Can vinegar remove mold from shower grout?
Yes. White distilled vinegar is a proven, natural mold remover that works especially well on light to moderate mold growth. Its acetic acid content breaks down mold and mildew while also helping prevent regrowth. For best results, spray undiluted vinegar onto the grout, let it sit for at least 60 minutes, then scrub. You can also combine it with baking soda for extra cleaning power.
How do I keep mold from coming back on grout?
Long-term mold prevention starts with moisture control and regular maintenance. After each use, wipe down tile surfaces and ensure the area is well-ventilated. Use an exhaust fan for at least 20 minutes post-shower. In addition:
- Seal grout lines every 6–12 months with a high-quality silicone-based grout sealer.
- Spray a mold-preventing solution weekly (white vinegar, tea tree oil, or commercial antimicrobials).
- Address any leaks or humidity issues promptly to eliminate the damp conditions mold thrives in.

About Vince Sandri
Vince Sandri is a disaster restoration content specialist with more than 12 years of experience researching, writing, and educating property owners about water damage, fire and smoke damage, mold remediation, storm damage, and other disaster recovery topics. Since 2014, he has served as the lead contributor to RestorationMaster.us, where he has developed hundreds of in-depth service pages, educational guides, and industry-focused articles for restoration professionals across the United States.
Through extensive research and ongoing collaboration with restoration contractors, Vince has built a strong foundation in the science, processes, and best practices behind property damage mitigation and recovery. His work aligns with industry standards like the IICRC and EPA guidelines, and helps homeowners, business owners, and property managers understand how disasters impact structures, what immediate steps to take, how professional restoration works, and how to prevent long-term structural and health risks.
Vince specializes in translating complex restoration procedures — including water extraction, structural drying, smoke odor removal, mold containment, and storm damage repair — into clear, actionable information that empowers readers to make informed decisions during high-stress situations. His content aligns with industry standards and focuses on safety, accuracy, and practical response strategies.
He earned his Bachelor of Arts degree from Aurora University and his master’s degree from DePaul University. Since 2012, Vince has focused on SEO-driven website content, technical service pages, and educational resources within the disaster restoration industry.
Outside of his professional work, Vince is also a musician and performs in the Chicago, IL area.